Step-by-step guideWebOwner / Admin
Upload, map, preview, and import a CSV file
What you will accomplish
You will create a CSV connection, map source columns, preview converted records, and interpret the import result.
Who can do this
Owners and Admins can import files.
Before you start
Prepare a CSV or text file with one header row and consistent data rows. Know the target track, rooftop, and the source column that uniquely identifies each record.
Create the connection
- Open Account menu → Config → Connect your data.
- Select the CSV area.
- Enter a connection name.
- Select the target track and rooftop.
- Select Add connection.
- Select the new connection.
Upload and discover fields
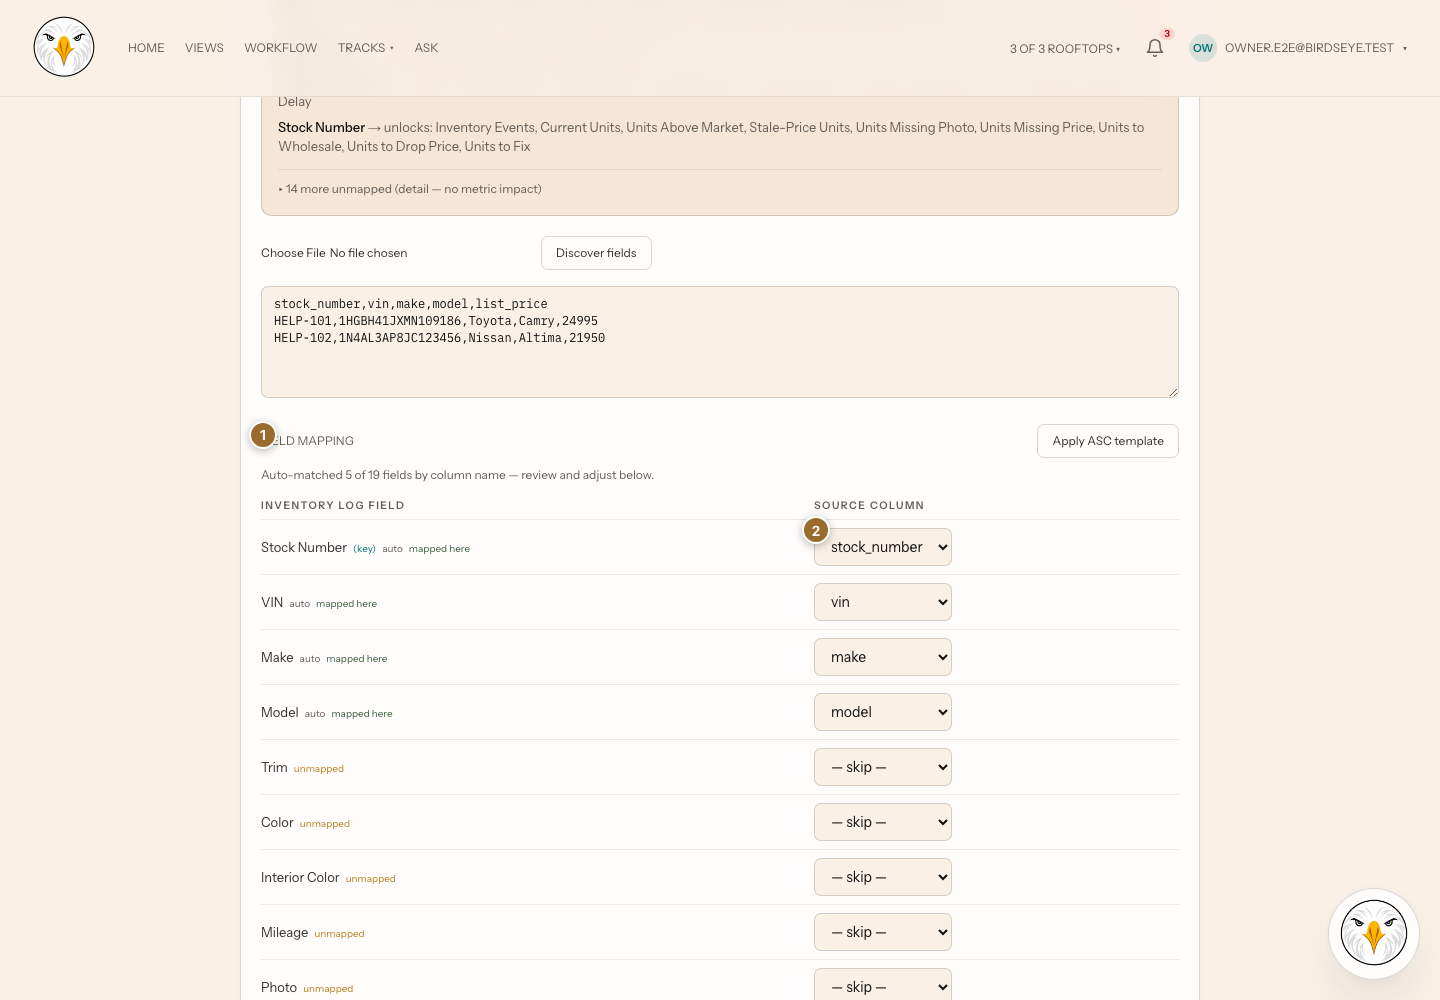
- Select Upload CSV file, or paste the header and sample rows into CSV data.
- Select Discover fields.
- Review every suggested match. An approximate auto-match must be verified.
- For each required Birdseye field, select the correct Source column.
- Ensure the track's correlation key is mapped.
- Configure rooftop routing if one file contains multiple rooftop codes.
- Select Save mapping.
Preview and import
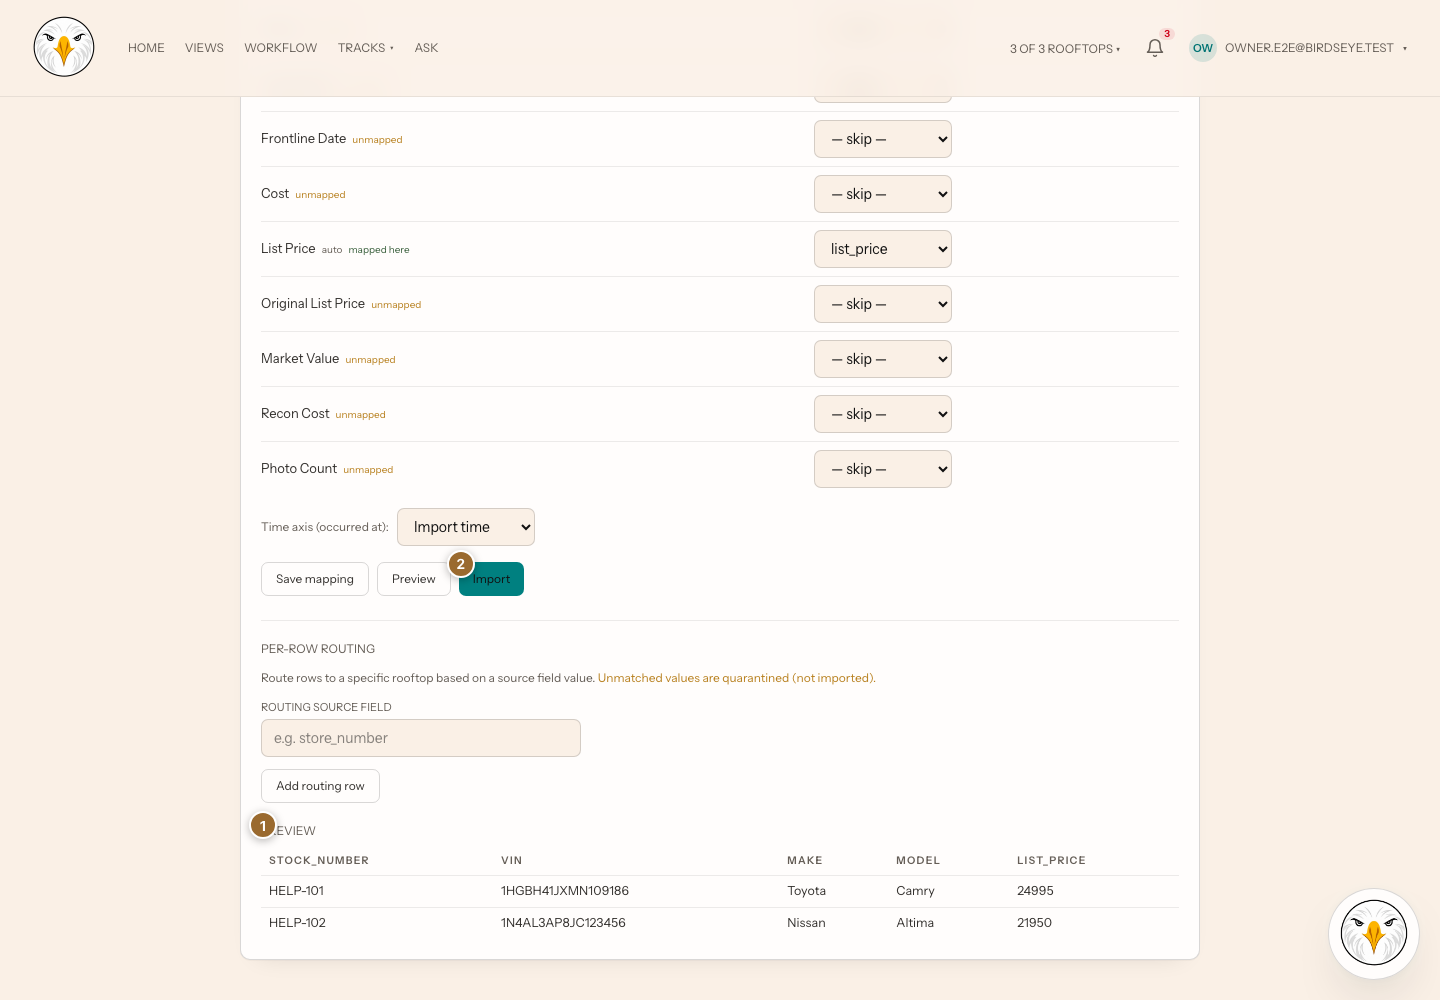
- Select Preview.
- Inspect converted values, dates, rooftop routing, and warnings.
- Correct the mapping when a value is wrong.
- Preview again.
- Select Import only after the preview is correct.
- Read the import result and history.
Expected result: valid records are written to the selected track and scope. Rejected rows remain identified by the import result.
Troubleshooting and recovery
- Import is disabled: map the required correlation key.
- Columns are not found: confirm the first row contains headers, then discover fields again.
- A file is quarantined: open the history and read the reason; correct structure, mapping, or routing before retrying.
- Rows went to the wrong rooftop: stop and correct routing before another import.
Related articles
Last verified against the product on 2026-07-29.